How to Make a Storyboard in 2026
April 16, 2026 · 10 min read
A storyboard is a visual plan for your film. It turns your screenplay into a sequence of images that show what each shot will look like before you start shooting. This guide walks you through the entire process, whether you prefer sketching by hand, using digital tools, or generating storyboards with AI.
What is a Storyboard?
A storyboard is a series of drawings or images arranged in sequence to represent the shots of a film, video, or animation. Think of it as a comic book version of your screenplay. Each frame represents a single shot and includes information about camera angle, framing, character positions, and movement.
Directors like Alfred Hitchcock, Martin Scorsese, and Ridley Scott are known for storyboarding their films in detail before stepping on set. Even if you are working on a short film or a micro-budget indie production, storyboarding helps you communicate your vision to your crew and saves time on shooting days.
Why You Need a Storyboard
Storyboarding is not just for big-budget productions. Here is why every filmmaker should do it:
- Saves time on set. When everyone knows what the next shot looks like, you spend less time explaining and more time shooting.
- Catches problems early. You will notice continuity issues, impossible camera moves, or missing coverage before it costs you a day of production.
- Helps your crew prepare. Your DP, gaffer, and art department can plan lighting, lenses, and set dressing in advance.
- Keeps you on schedule. A storyboard doubles as a visual shot list. You know exactly how many setups you need per scene.
- Gets funding. Investors and producers take you more seriously when you show them a visual plan for your project.
Step 1: Break Down Your Screenplay
Before you draw a single frame, you need to understand the structure of each scene. Read through your screenplay and identify:
- How many scenes you have and where they take place
- Which characters appear in each scene
- The key actions and emotional beats
- Any props, vehicles, or special effects involved
This process is called a screenplay breakdown. It gives you a clear picture of what needs to be visualized. Many filmmakers use spreadsheets or production software to organize this information, but even a simple list works for smaller projects.
Step 2: Create Your Shot List
A shot list is a numbered list of every camera setup you plan to shoot. For each shot, you should note:
- Shot type: wide, medium, close-up, extreme close-up, over-the-shoulder
- Camera angle: eye level, high angle, low angle, bird's eye, Dutch tilt
- Camera movement: static, pan, tilt, dolly, tracking, handheld, crane
- Lens: wide angle, normal, telephoto (if you have a preference)
- Description: what happens in the shot
Your shot list is the backbone of your storyboard. Each shot on the list becomes a frame (or multiple frames) in your storyboard.
Step 3: Choose Your Storyboarding Method
There are three main ways to create storyboards today. Pick the one that fits your skills and timeline.
Hand-Drawn Storyboards
The classic approach. You sketch each frame on paper or on a storyboard template. You do not need to be a great artist. Stick figures and simple shapes are enough to communicate camera angles and character positions. What matters is clarity, not beauty.
Best for: filmmakers who think visually and enjoy sketching, small projects, and situations where you want full creative control over every detail.
Digital Storyboard Software
Digital storyboard tools let you create storyboards on your computer. You can organize shots, set camera angles, add descriptions, and rearrange your storyboard as the plan evolves. The advantage is speed and the ability to export and share boards with your team.
Best for: collaborative projects, productions where the storyboard needs to be shared and revised frequently, and filmmakers who prefer typing over drawing.
AI-Powered Storyboards
The newest approach. AI tools can read your screenplay and generate visual frames automatically. You describe what happens in a scene, and the AI creates an image for each shot. This is not about replacing the director's vision. It is about getting a first draft quickly that you can then refine.
Best for: fast pre-production timelines, filmmakers without drawing skills who want realistic visuals, and projects where you need to pitch a visual concept quickly.
Step 4: Build Your Storyboard Frame by Frame
Now it is time to create the actual storyboard. For each shot on your list:
- Set the frame. Draw or generate the image showing what the camera sees. Include the main characters, key props, and the environment.
- Add camera information. Note the shot type (CU, MS, WS), camera movement (if any), and lens choice.
- Include action notes. Write a brief description of what happens in the shot. Keep it short: "Sarah opens the door and sees the empty room."
- Mark transitions. If there is a specific cut, dissolve, or transition between shots, note it.
- Number everything. Each frame should have a scene number and shot number so your crew can reference it easily.
Step 5: Review and Revise
Your first storyboard is a draft. Review it with these questions in mind:
- Does the visual flow make sense? Can you "watch" the scene by flipping through the frames?
- Is there enough coverage? Do you have wide shots to establish the space and close-ups for emotional moments?
- Are the transitions smooth? Does the audience know where they are at all times?
- Can your crew understand it? Show it to your DP or AD and ask if anything is unclear.
Revise until you are confident that the storyboard represents what you want to see on screen. It is much cheaper to change a drawing than to reshoot a scene.
Step 6: Share with Your Team
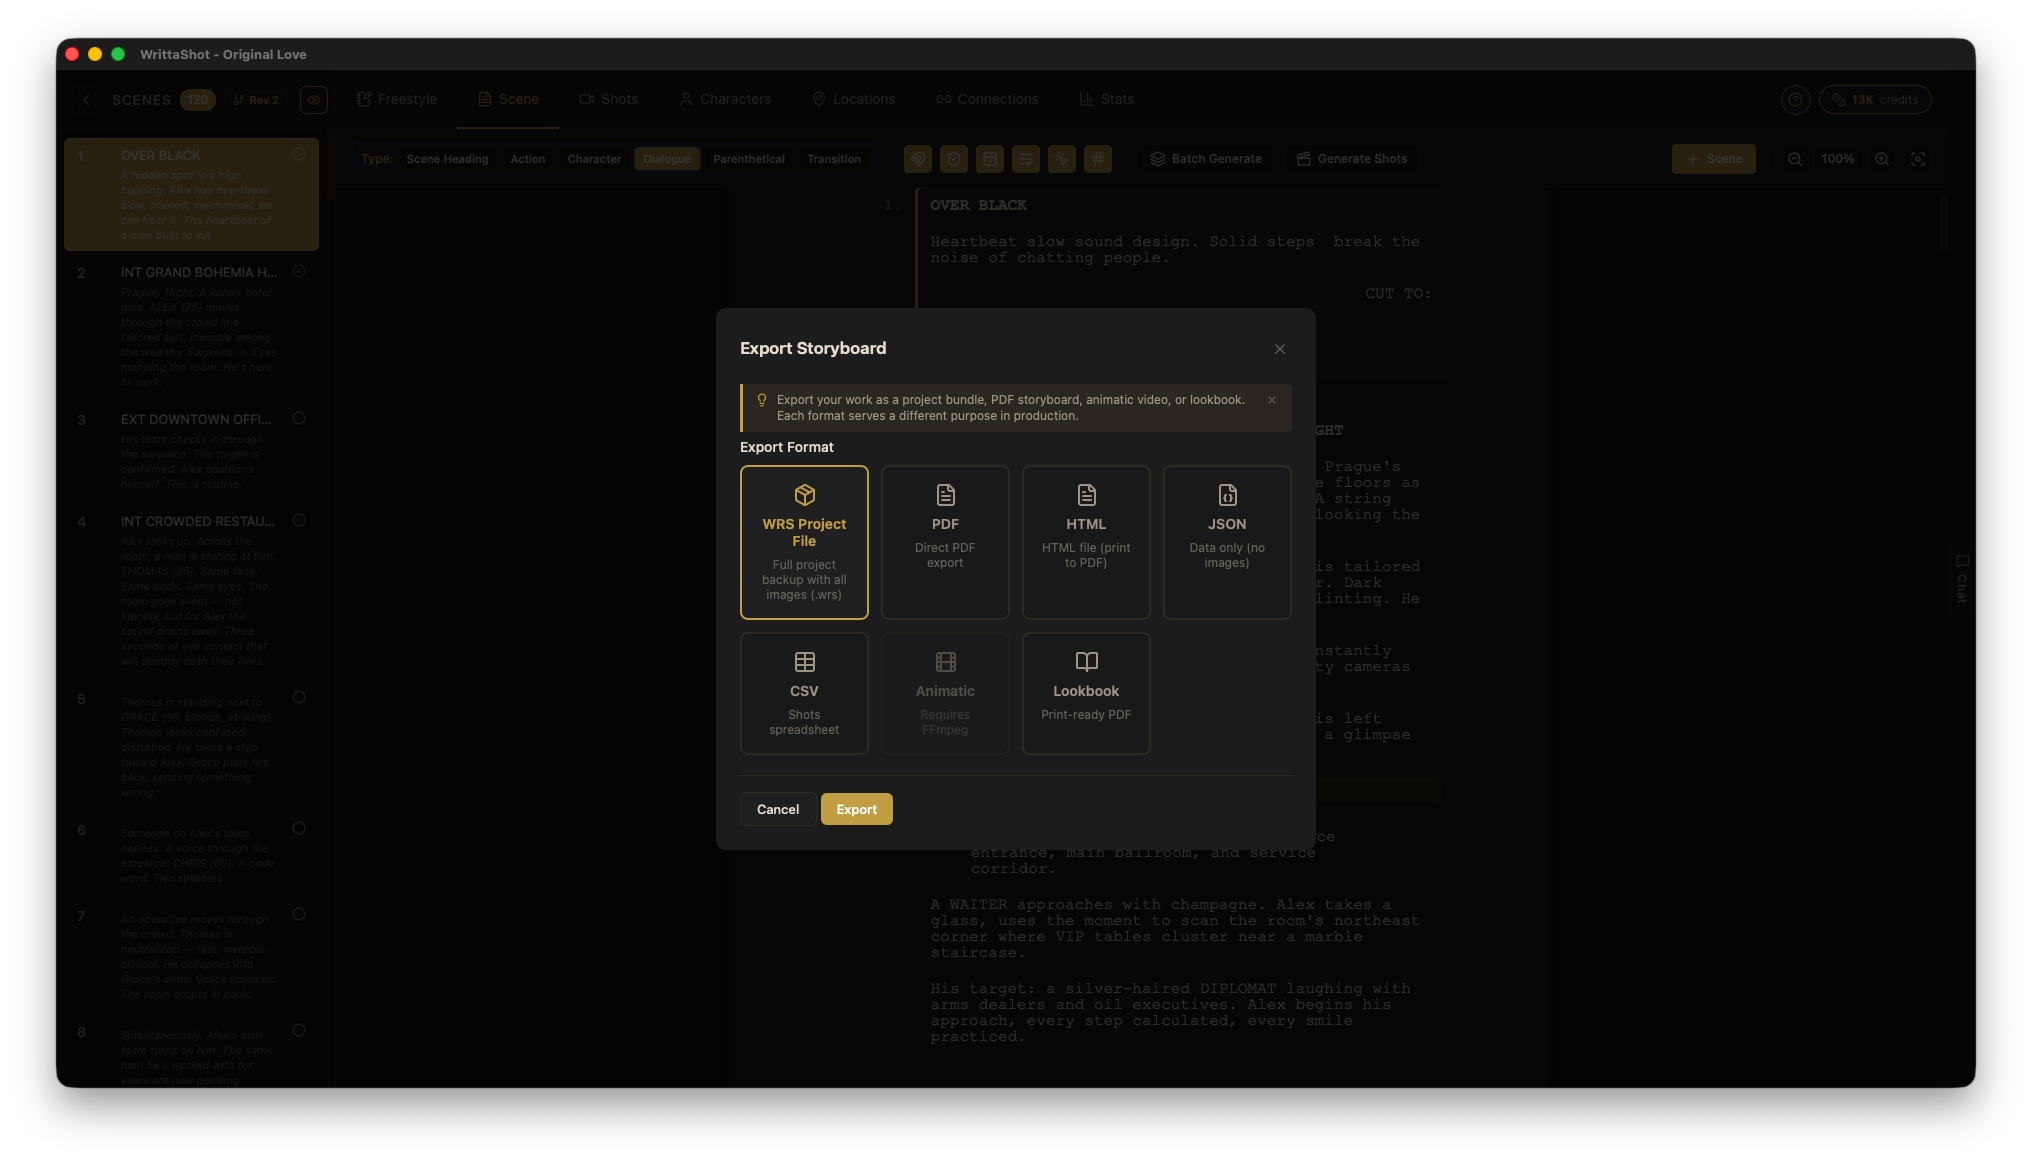
A storyboard is a communication tool. Export it as a PDF or print it out and distribute it to your key crew members before the shoot. Some filmmakers pin the storyboard frames on a board on set so everyone can see the current shot and the next one coming up.
From Screenplay to Storyboard: The Modern Workflow
The traditional workflow (write screenplay, create shot list, draw storyboard) still works. But modern tools can compress this process significantly.
With WrittaShot, the workflow looks like this:
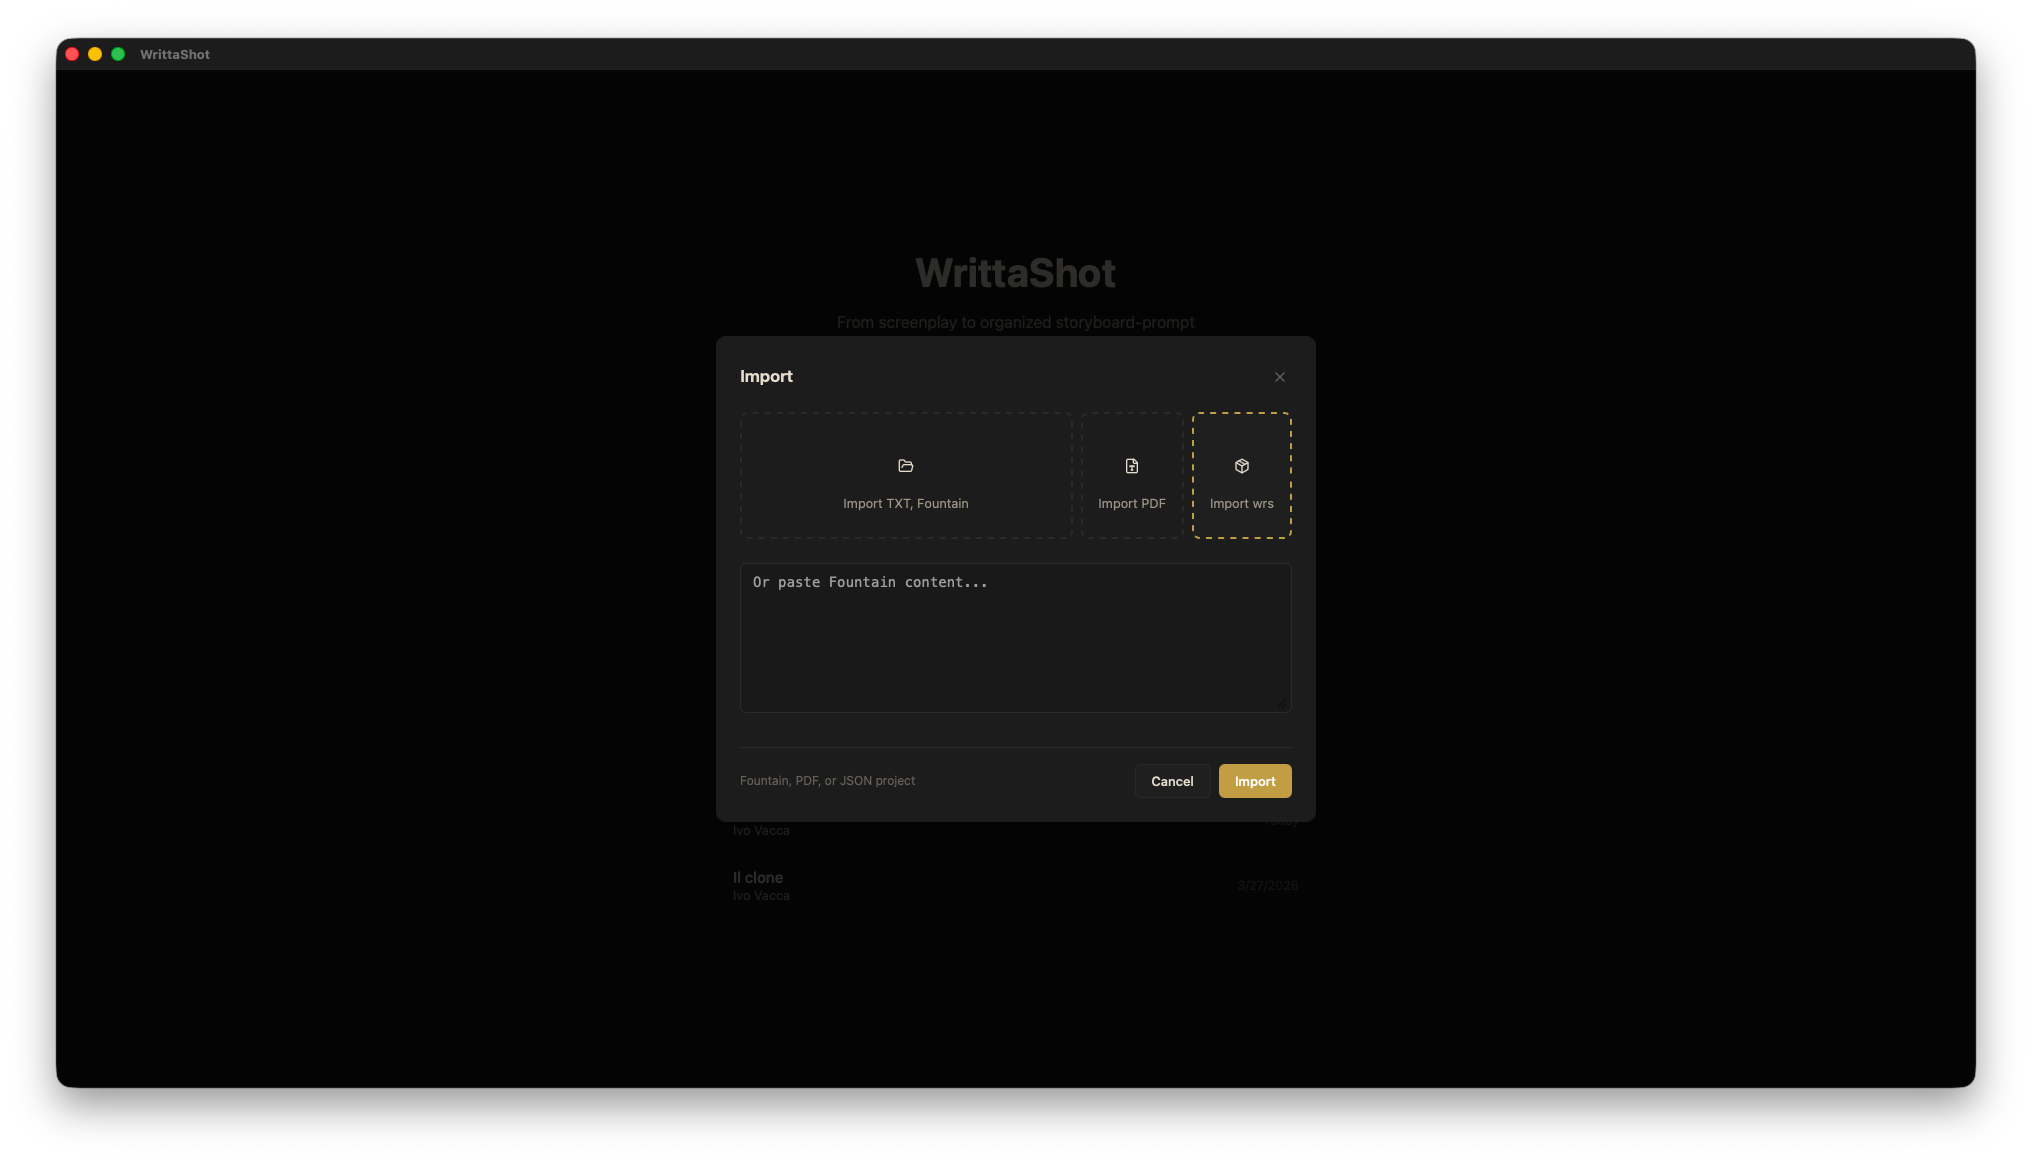
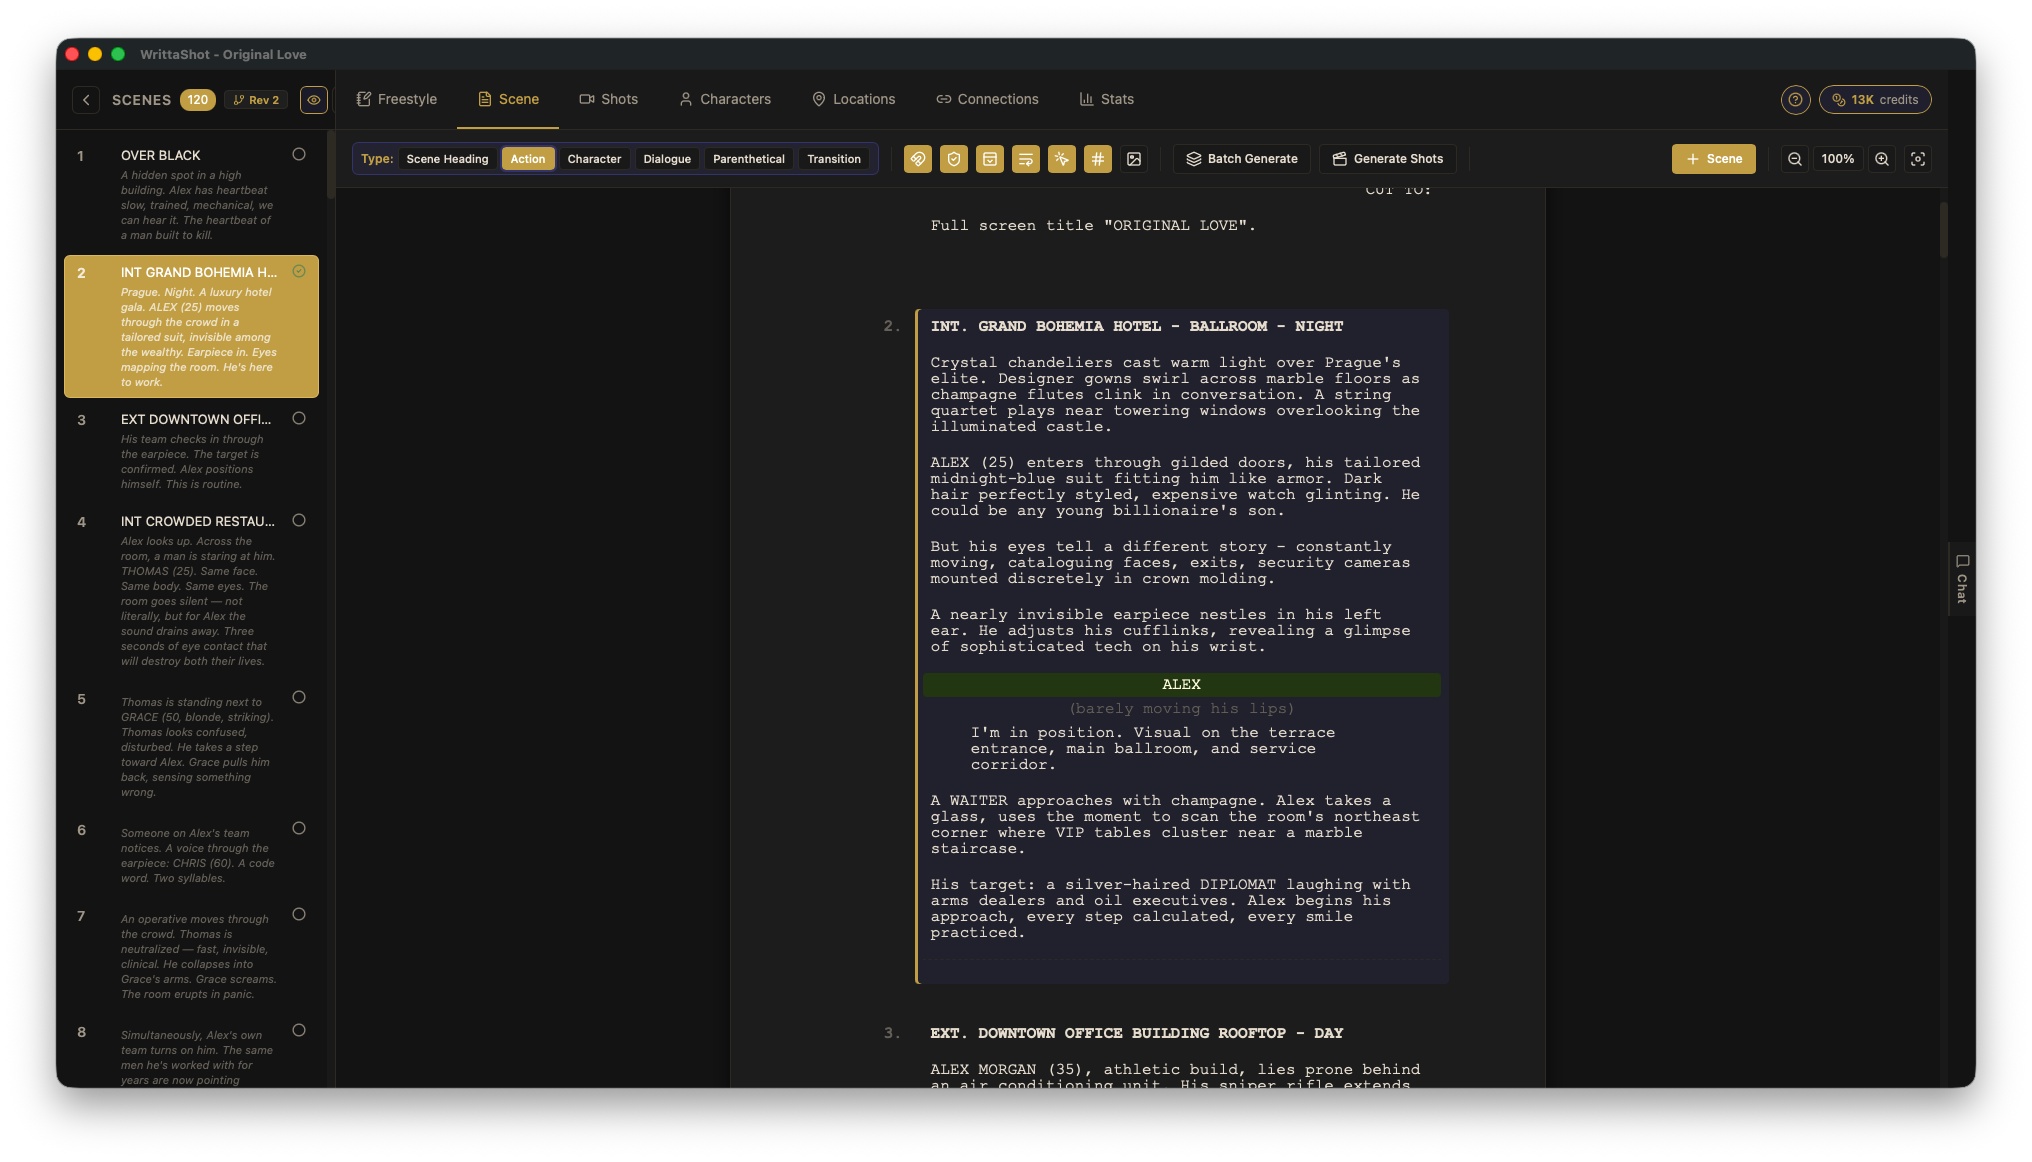
- Import your screenplay (Fountain, PDF, TXT, or RTF format)
- The app automatically breaks it down into scenes and identifies characters
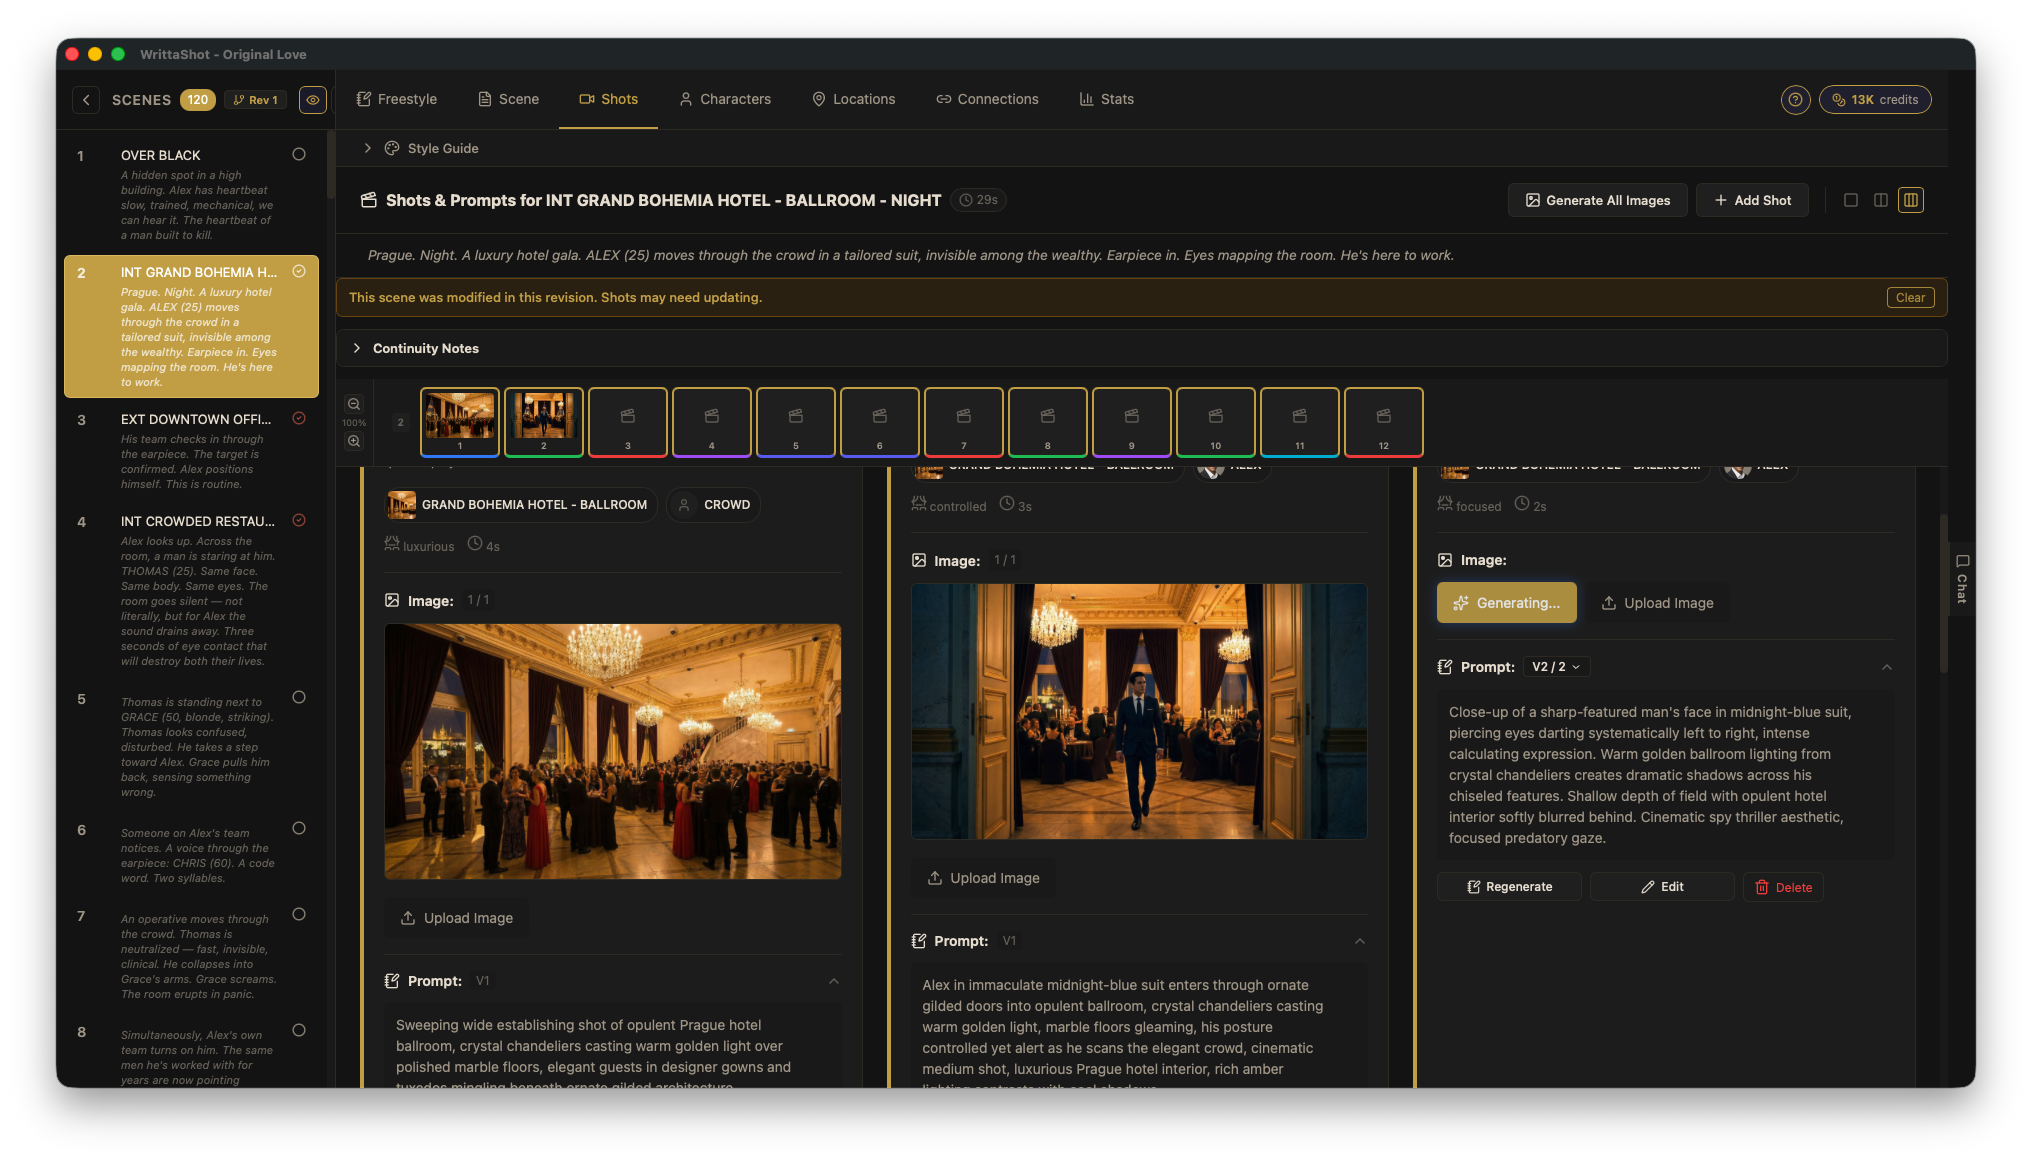
- Create your shot list directly from each scene, with shot type, angle, and movement
- Generate storyboard images for each shot using AI (optional) or add your own reference images
- Export your complete storyboard as a PDF ready for your crew
The entire process from screenplay to finished storyboard can take hours instead of days. And because everything is connected (screenplay, shot list, and storyboard live in one project), changes propagate automatically. If you add a new shot, it appears in the storyboard. If you rearrange scenes, the shot list updates.
Storyboard Tips from Working Filmmakers
- Start with the key moments. You do not need to storyboard every single shot. Start with the scenes that are most complex, most expensive, or most important to the story.
- Think in sequences, not individual shots. A storyboard should flow. Each frame should lead naturally to the next one.
- Use arrows for movement. Show camera movement and character movement with simple arrows. It is clearer than trying to draw motion blur.
- Include sound notes. If a particular sound effect or music cue is important to the scene, write it under the frame.
- Keep it simple. The goal is communication, not art. If your crew understands the shot, the storyboard did its job.
Ready to Start?
Storyboarding does not have to be complicated. Whether you grab a pencil and a stack of index cards or use a dedicated tool, the important thing is to plan your shots before you step on set. Your future self (standing in the rain with 30 people waiting for direction) will thank you.
If you want to try the screenplay-to-storyboard workflow described above, download a free 7-day trial of WrittaShot and see how fast you can go from script to storyboard.

Filmmaker, developer, founder of WrittaShot